My apologies in advance as this is an image-heavy post and I'm a crappy photographer. Further, given where this is located in my house, it's nearly impossible to get a shot of the whole thing.
So... there are such things as light stands for starting seeds. Before I lived here, I never needed one, I used a windowsill. But here with stone walls, the windowsill is so thick the light just doesn't get through. Seedlings get all leggy here.
Leggy means they are thin and weak, they've grown reaching for the light.
The solution to this is a light stand. All the gardening catalogs have these. They cost several hundred bucks and hold 2-4 trays or so. The lights are on chains so you can raise or lower the lights. This way, you can start the seeds within a couple inches of the light, then raise it as the plants grow.
Which works great as long as you have someone on the other side of the chain to help you adjust it. And all your plants all grow at the same rate. And if you're only going to start a few seeds. And if you don't mind shelling out a few hundred bucks.

Couple years ago, a series of circumstances resulted in me getting 4 shoplights for free. Hubby asked me what I wanted to do and I said... buy four more and build a plant stand.
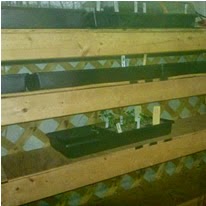
The basic construction is 4 shelves with 2 recessed lights in each. The shelves are mounted on 4 2x4 ends and the back and sides have lattice nailed on to give some crosswise stability.
Each shelf is long enough to hold 5 trays, so I can have 20 trays in there at once. I grow in six-packs; the trays hold 12 of these so can have 72 plants each. Thus my seed-starting cart can hold 1440 plants total!
Yes Virginia, you can start your own onions. Hundreds of them!
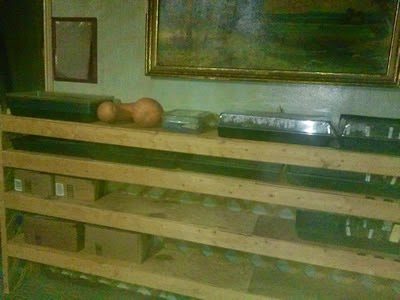
This shows the stand in late February. I didn't actually start onion seeds this year, but ordered plants.
The top shelf has no lights above it; I have extra trays, my final winter squash from last year, my seeds in an air-tight container with silica gel, a tray with 6-packs sitting in water ready to plant, and a second tray that has planted seeds sitting on a heating mat.
Once sprouted, the seeds move down to the second shelf. This is 4 inches below. Given that the six packs are about 2 inches tall, this puts my sprouts about an inch from the grow light when they get there. The lights are off in this picture as I can't get pictures with them on worth a darn.
So there's 2 lights per shelf. The lights from each side plug into a power bar on their respective sides. The two power bars plug into a timer that is set for 16 hours. I plug the lights in as needed; in this picture, the top 2 lights on the right are plugged in, though the picture was taken during the 8 hour off period so you could actually see something.
This plant stand sits along the coldest wall of my house. Thus it also acts a bit as a root cellar. Besides the lone squash, those cardboard boxes are full of potatoes harvested last fall.

Instead of moving lights, I move the 6-packs of plants. The next shelf down is 6 inches below the light. So when the seedlings are too big for the first light shelf, they get moved down another level.
The bottom shelf is then 8 inches below it's lights and the floor is 10 inches from the lights above it.
This is early in the season; all I've got started thus far is spring brassicas (broccoli, spring cabbage, red cabbage, bok choy, napa) and my 3 eggplants. Tomatoes are up next!
There is a "gate" made of snow fence in front of my light stand. This is because I have cats who consider any fresh dirt their personal playground.

Finally, here is a picture showing a light actually on above a tray. As you can see, you can't!
Image credit: my indoor light stand by Jackie Patti